VUI Software Guide

Download
Download the latest version of VUI on a computer connected to your Dante™ network.
- VUI for Windows: vui_0.8.0.exe
- VUI for MacOS: vui_0.8.0_x64.dmg
Introduction
VUI stands for "Venueflex User Interface". The intent of the VUI software is to provide a single interface to control and configure all Fulcrum Immersive products. This guide will show you how to get started with the basics of VUI.
Installation
The following instructions will guide you through installing the VUI software on your computer.
System requirements
VUI supports Windows or MacOS. Below is a list of minimum system requirements, however in most cases VUI should run at a basic level on most all modern computer setups as long as the Operating System is supported.
Windows 10- Intel i3
- 8GB of RAM
- At least 1GB of Hard drive space (SSD will render better performance)
- Ethernet or WiFi Adapter (Ethernet preferred)
- Integrated Graphics with support for at least 1600x900 pixels
- Intel i5 or Apple Silicon M1
- 8GB of RAM
- At least 1GB of Hard drive space (SSD will render better performance)
- Ethernet or WiFi Adapter (Ethernet preferred)
- Integrated Graphics with support for at least 1600x900 pixels
Installation on Windows
- Download the Windows installer executable (.exe) and double click to begin installation.
- The VUI software will automatically install, during that process you should see a loading screen appear. Once completed VUI will automatically startup and be ready to use
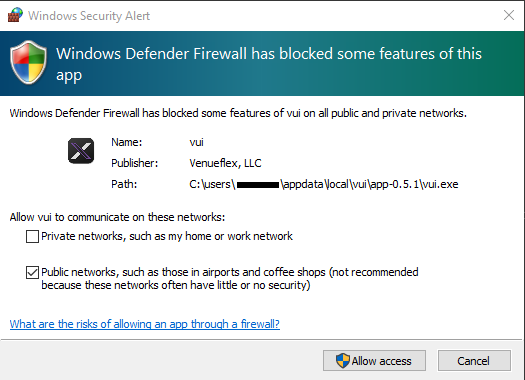
The very first time you install VUI on your machine, Windows Defender Firewall may show an alert to allow VUI network access. Be sure to click Allow Access , otherwise VUI will not be able to communicate with or discover any processors over the network. Also, in most cases, its a good idea also select Private networks access on that screen to ensure VUI works on all networks.
Installation on MacOS
-
Download the MacOS installer file (.dmg) and double click to mount the installer image.
-
Once the installer mounts, you will see a window showing the VUI app icon and your computer's Application folder. Drag and drop the VUI app into the Application folder shown.
-
Once complete, unmount the installer image by one of the following methods:
- On the desktop, drag and drop the mount to your trash bin in the dock. The trash bin will change to an Eject Icon when hovering over it.
- In a finder window, click the eject button next to the mount in the sidebar
-
Launch the VUI application from inside the Application folder
Live
Once everything is configured and setup in VUI, the Live tab will be your home spot to control all of your products. There should be only rare cases where you will need to go to other tabs during a show setting.
Processors
The Processors tab is where you will go to connect to new or existing processors. VUI will automatically discover processors on your network. Here you can also perform operations on the processors like naming, network setup, and firmware updates.
General
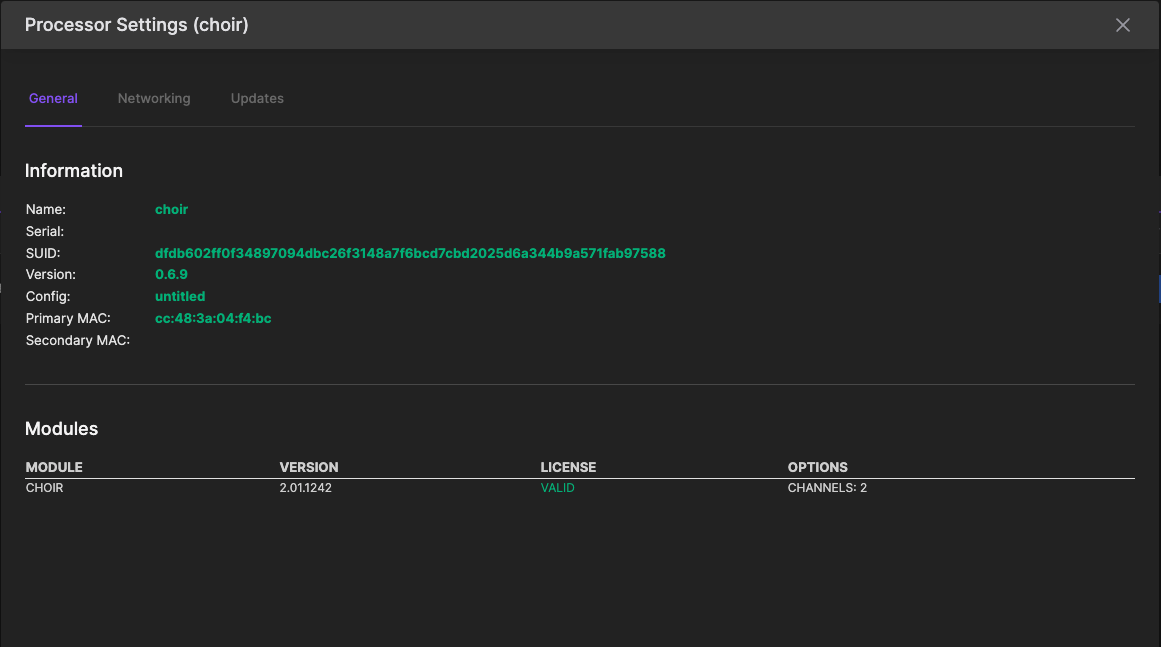
The processor general tab shows basic information about the currently selected processor. Here you can find the serial number, network MAC address, software version, and other various details that can be useful in certain situations. The general tab also will show what licenses your processor has installed. Fulcrum Immersive processors can serve multiple purposes, so the licensing table will provide details regarding that.
Networking
The processor networking tab allows you to change the name of the processor and set the network IP settings. By default, Fulcrum Immersive processors ship with DHCP enabled on both interfaces. Static IPs are recommended for larger networks and you if you're trying to reach the processor from different subnets.
-
Use the Processor Name field to specify a network hostname that you can identify the processor with. It is recommended to use unique names per processor to better distinguish them.
-
To set a static IP, click off the DHCP toggle icon. That will then allow the fields to be edited.
-
To set a network interface to DHCP, simply click the DHCP toggle icon. Any IP information in the text fields will be ignored.
-
When finished, click Save
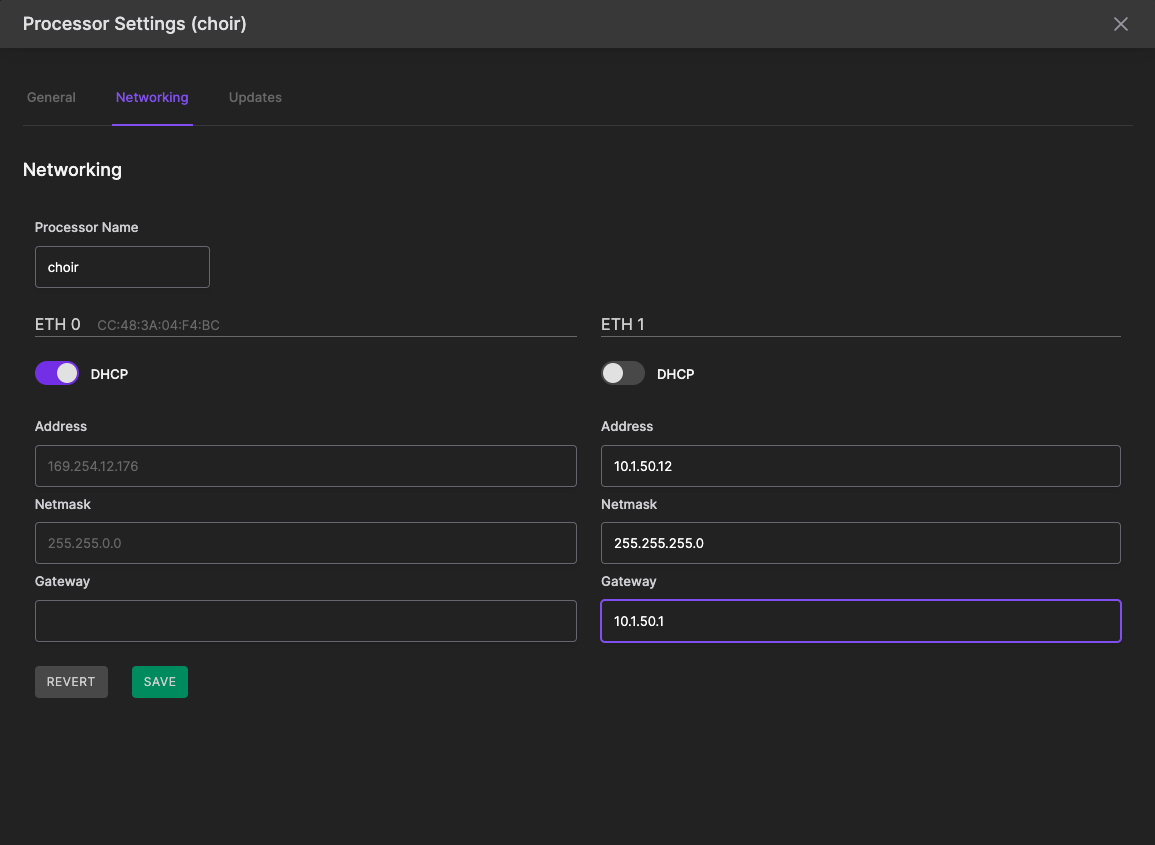
Save in order to make settings take affect. This includes saving the processor name. Use Revert to return settings to what they were before you modified themUpdating
VUI has the ability to push new firmware updates to network connected processors right from inside the software. This ensures that your device can receive bug fixes and new features as time goes on.
Preferences
VUI has local user preferences that can be adjusted for a specific installation. These preferences do not effect other VUI instances or procesors on the network. Only the local user machine is effected.
The preferences menu can be accessed by going to File > Preferences

Startup configuration
For permanent installations, VUI offers the ability to automatically load a configuration file upon start of the software. From the preferences window, choose Select under Startup Config . A file-load window will appear allowing you to choose a locally-saved configuration file. If you do not have one yet, be sure to create one or load from a processor and save the configuration locally.

Preferred network
VUI allows you to choose your preferred network interface under the preferences menu in order to better discover devices when using multiple network cards. The following steps will walk you through setting your preferred network adapter.
-
Open Preferences by going to File > Preferences .
-
Choose your desired network interface from the list. If you connect or change your interfaces while this window is open, use the refresh button on the right side to update the list with the latest interfaces.
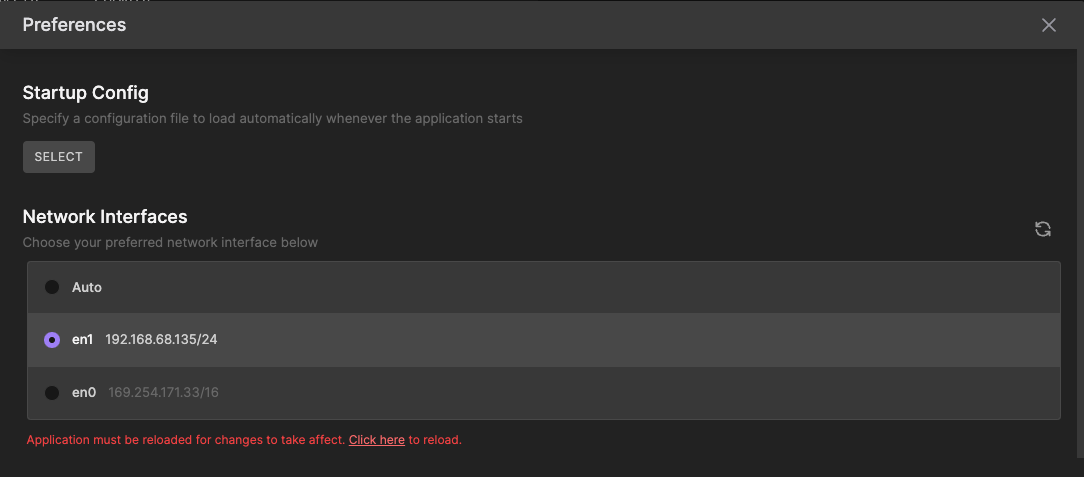
- Restart VUI for the changes to take affect.